
Paper Star Tutorial
This paper star tutorial is as easy and magical as it looks and it only takes a few supplies. Watch this simple video tutorial then gather up a few basic supplies and you’re on your way. Detailed instructions below.
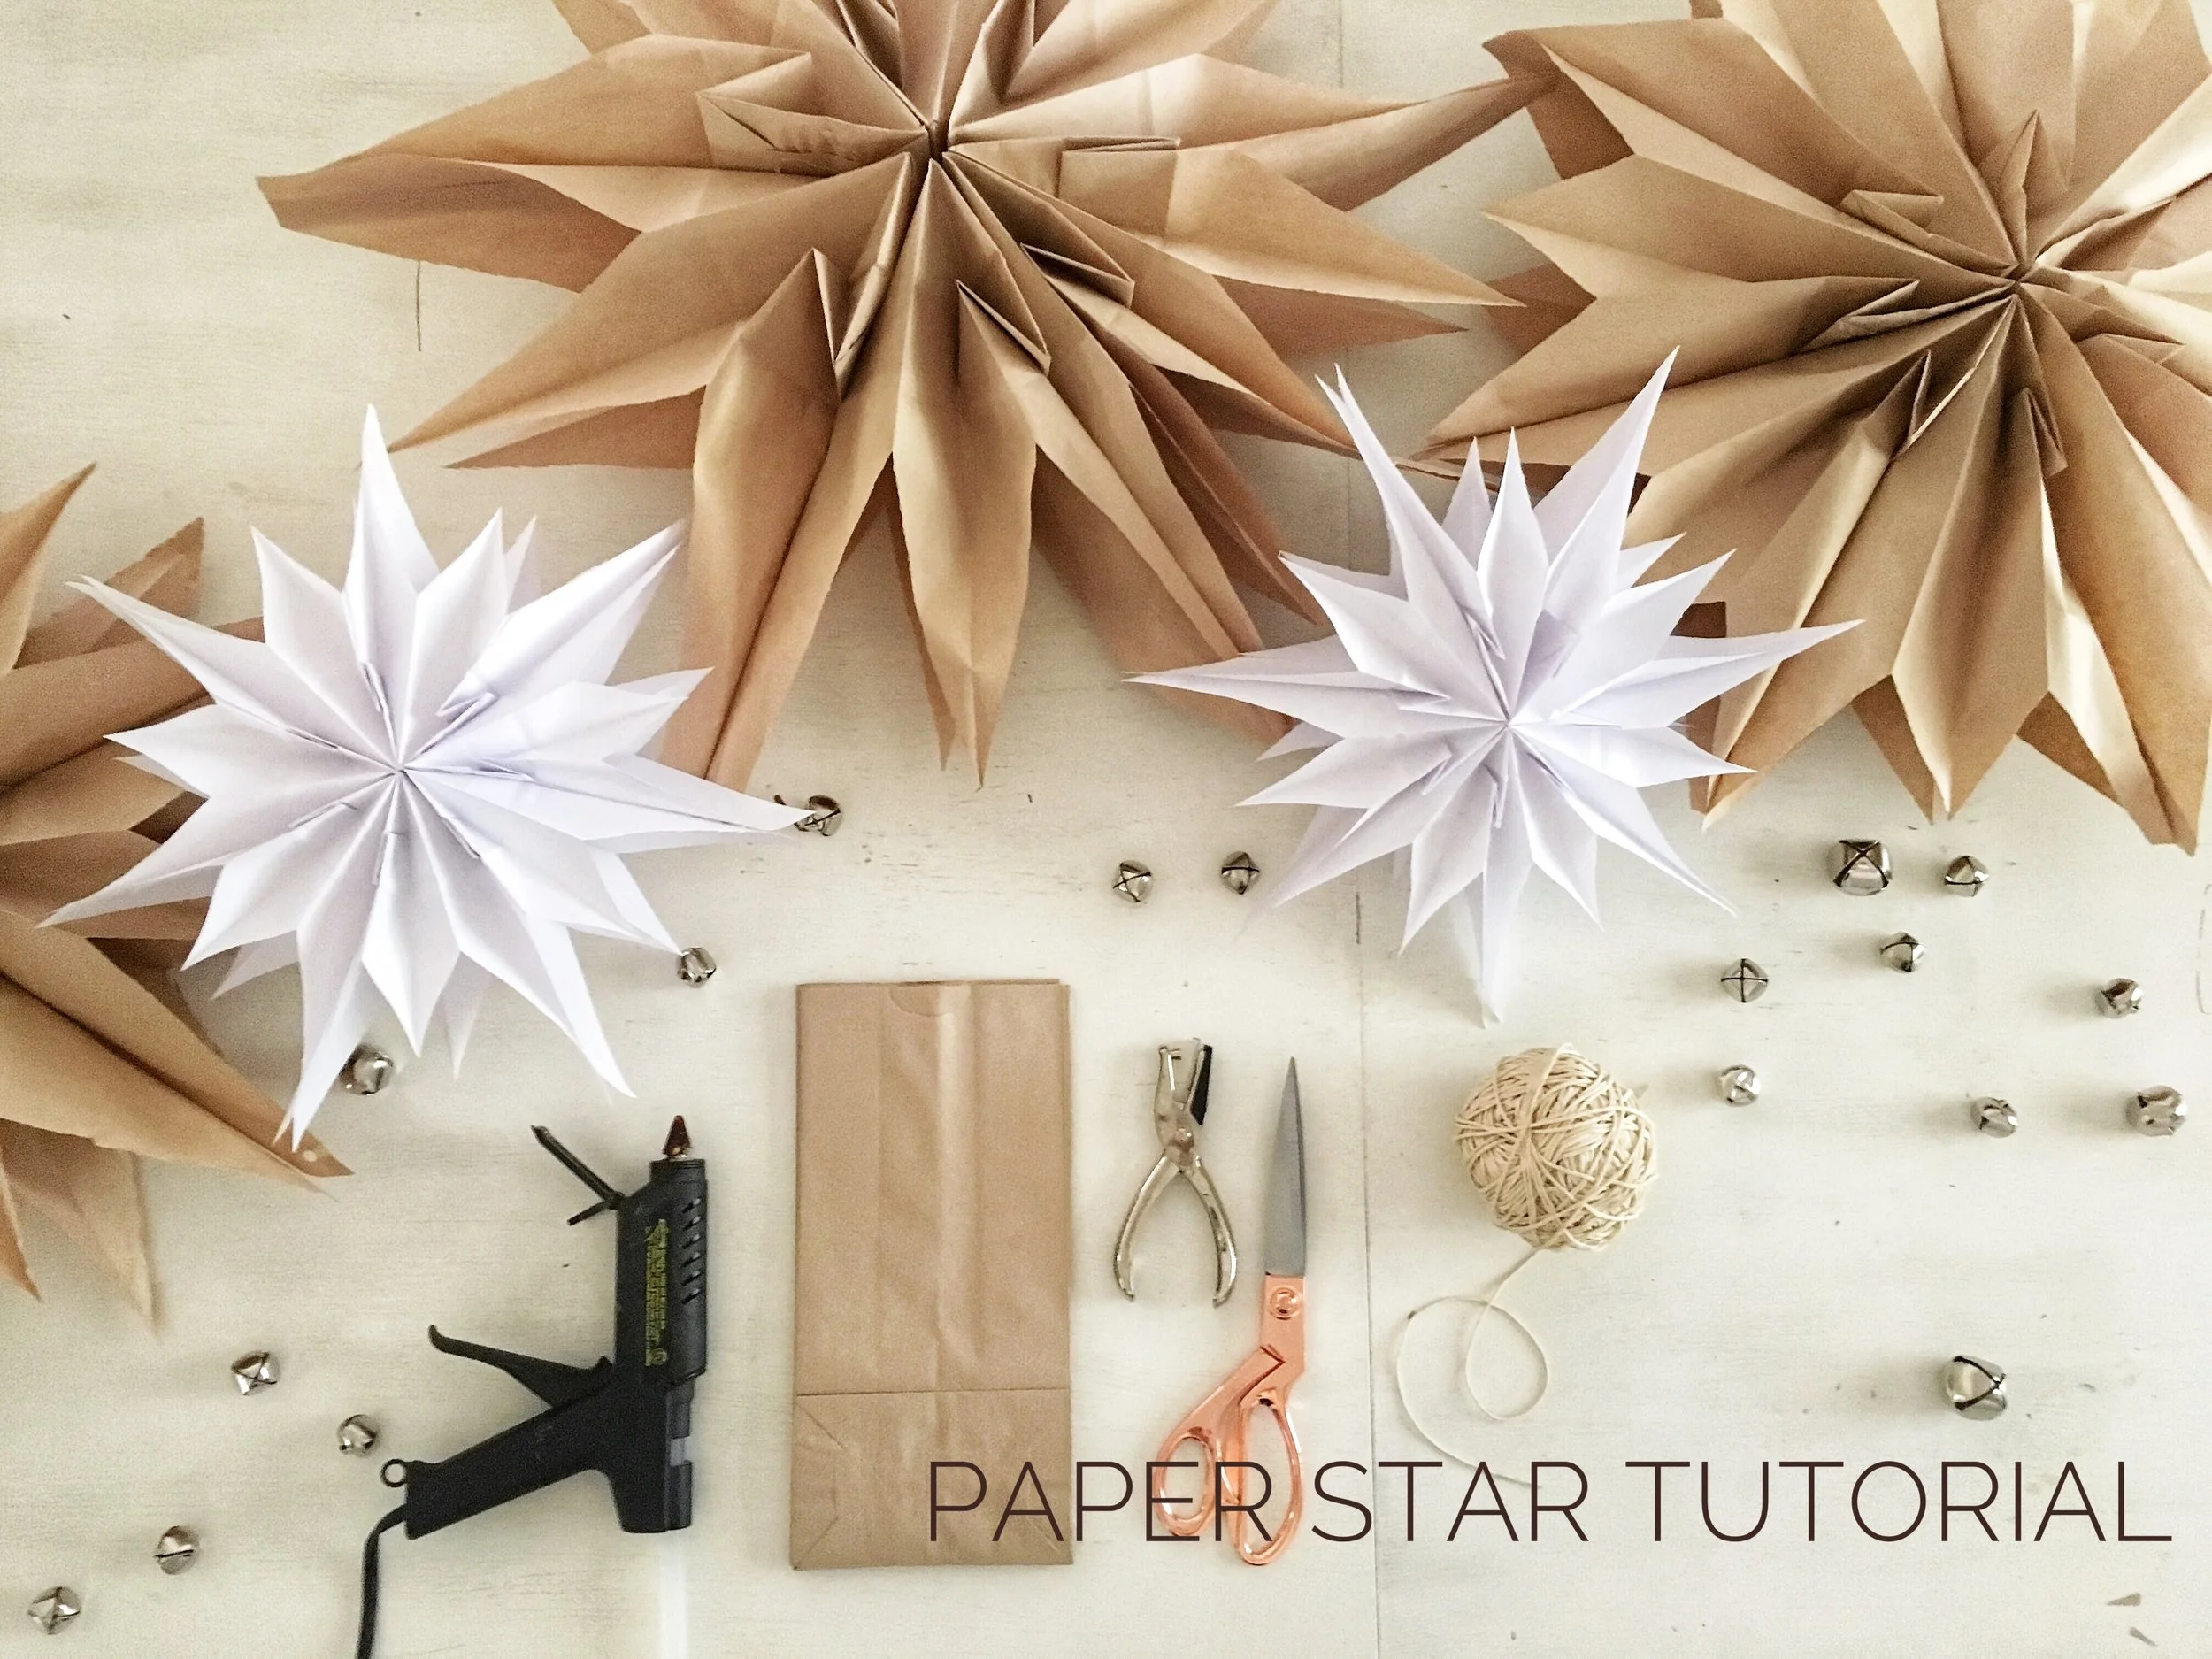
Here’s what you’ll need:
7 paper bags per star
glue gun and glue sticks
scissors
Glue three bags together then cut to a point and set aside.
Next, glue four bags together and cut to a point.
Doing this in two small batches makes it easier to cut. They don’t have to match perfectly, mine never do and the results are beautiful.
Next, glue the two stacks of bags together and unfold.
That, my friends, is Christmas magic!
Glue the ends together.
Punch a small hole in one of the star tips to hang with string or wire.
I used two different sizes of brown paper lunch bags I purchased at the grocery store and small white craft bags from the craft store. Use any color you like. Printed bags would be pretty as well. Mix it up!
These stars are perfect for the holiday season. I brought some with me on my most recent photo shoot at The Vintage Round Top last week. The styling for the shoot told the story of owner, Paige Hull’s, Swedish heritage and the stars were the perfect fit.
photo Kerry Kirk Photo